

Thursday, April 21, 2011
Scrawny Johnny wants to learn about triathlons
Ok here's the informational web game I created. It took me a while and actually needed more time. Im planning on going back and working some things. I am also planning to make it a little bit more informational, I only specified the info about the three sports involved in a triathlon. Hope you like it!
Monday, April 4, 2011
My business
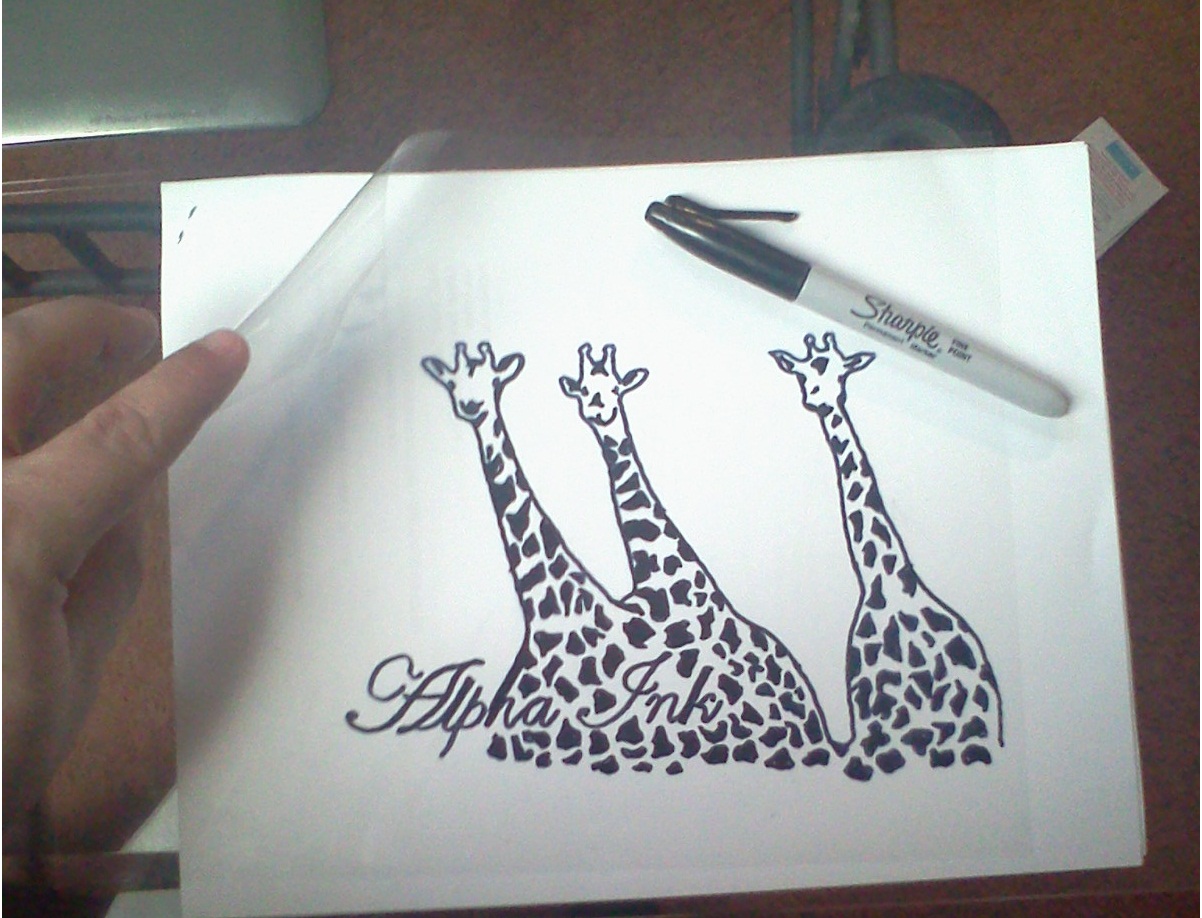
Me and my brother own a t-shirt printing business. We started about 2 years ago. Its name is AlphaInk. We enjoy doing this as a hobby, but it has grown to give us back some money. We silk screen t-shirts, hats, business cards, water bottles, mugs etc... We are in the process of buying a embroidery machine, so we can expand our cliental. Me and my brother contribute differently towards our business. I design and print the t-shirts, he finds the different companies that would like our services and he puts the money. We work on our printing business when we have spare time, but right now it has been hard, since Im going to school full-time and he works and goes to school full-time. We had a few clients that have ordered t-shirts from us. This clients are usually friends that have their own business. One of the main ones is a sushi restaurant own by Curt. The name of the restaurant is called Simply Sushi. Curt ordered 100 t-shirts for his business. He ordered white long sleeve t-shirts with the Simply Sushi logo in the middle and in the back part the Simply Sushi fish. The process that involves creating this type of t-shirt with two colors is the same process I have described recently on my blog, but using two different screens for the two color. Me and my brother will continue on. Hopefully one day it will grow to be something more.


Monday, March 28, 2011
You only have to TRI
This is the link to my website about Triathlons. If you are a beginner Triathlete this website is for you. Info, gear and tips about this great multi-sport event.

Sunday, March 6, 2011
fourth step
Now that you have the screen ready with the design we can finally create our t-shirt forcing one colour of fabric dye or paint through the unblocked areas of the fabric to the T-shirt.
You will need:

You will need:
- T-shirt
- Squeegee
- Fabric dye or paint
- Screen ready with design
- First, lay the t-shirt down on a flat surface.
- Lay the screen on top of the t-shirt. Center your design on the t-shirt.
- Secure the screen to the table somehow so it doesn't move around.
- Pour some ink at the top of the screen (away from you).
- With the squeegee slowly bring the ink across the image (dont put a lot of pressure) so is evenly inked.
- Second time bring the ink across one more time but this time apply a lot of pressure (all in one motion).
- Once you have the design printed in the t-shirt let it dry under a lamp or sun.

Monday, February 21, 2011
Third Step
Ok now that you got your screen with the dry photo emulsion and you have your design/artwork on a transperancy you are ready to burn the screen. That means we need to expose the silk screen emulsion to light.
You will need:
-Set your artwork on the screen with a sheet of glass over it. The glass will keep your design in place during the burning.
-Place the screen with the design and the piece of glass on top of the cloth.
-Put the exposure light about 1 foot above the screen.
-Expose the screen for about 10 to 12 min.
-When done take the screen to a sink or tub and spray with water. Preferably mist. Rinse it off until you can see your design through the screen.
-Let it dry for a few minutes.
This steps are crucial. It will be the toughest part of screen printing. Hopefully after a few tries you will get it.

You will need:
- A piece of glass that fits on your screen.
- Black cloth.
- A lamp with a 150W clear incandescent bulb or a BBA No.1 Photoflood bulb.
-Set your artwork on the screen with a sheet of glass over it. The glass will keep your design in place during the burning.
-Place the screen with the design and the piece of glass on top of the cloth.
-Put the exposure light about 1 foot above the screen.
-Expose the screen for about 10 to 12 min.
-When done take the screen to a sink or tub and spray with water. Preferably mist. Rinse it off until you can see your design through the screen.
-Let it dry for a few minutes.
This steps are crucial. It will be the toughest part of screen printing. Hopefully after a few tries you will get it.

Sunday, February 13, 2011
Second step
Preparing a Positive:
While waiting for step one, create a design for printing.
Preparing a positive, means that the exposing silk screen needs a design that is black on a transparent paper. There is different ways to do so, but we are gona use the easiest way.
Materials:

While waiting for step one, create a design for printing.
Preparing a positive, means that the exposing silk screen needs a design that is black on a transparent paper. There is different ways to do so, but we are gona use the easiest way.
Materials:
- Black marker.
- Clear tape.
- Blank Transparency paper
Remember for this step the design/artwork has to be all black. All the clear areas of the positive allow ultra violet light to pass trhough it. All the dark areas of the positive block the ultra violet light and leave the photo reactant emulsion on the background unharden. All of the soft areas left unharden when sprayed with water will rinse out, leaving a hole in the mesh were ink can pass through.
Friday, February 4, 2011
First step
First of, you need a dark place with enough elbow room to work in. A table waist high in a dark room will do. The reason why the room has to be dark is because we are going to apply the photo emulsion to the silk screen, and the photo emulsion is sensitive to light. (Although some emulsions are safe against sun light.)
The materials you will need to use with the next steps are:
The materials you will need to use with the next steps are:
- Silk screen.
- Photo emulsion.
- Squeegee.
- Towels.
- Red photo dark-room light.
Ok, Ready? here we go:
- Place some towels on top of the table so you dont damage it with paint or emulsion.
- Wet the silk screen using the squeegee by spreading the emulsion on both sides, make sure you are doing this with no light present, also make sure the whole thing is wet, with no spots missed. Since you cant use normal light to check if you got the screen fully wet, use a red photo-darkroom light.
- Let it dry in a complete dark room over night.
Subscribe to:
Posts (Atom)