Sunday, February 13, 2011

Second step

Preparing a Positive:
While waiting for step one, create  a design for printing.
Preparing a positive, means that the exposing silk screen needs a design that is black on a transparent paper. There is different ways to do so, but we are gona use the easiest way.
Materials:
  • Black marker.
  • Clear tape.
  • Blank Transparency paper
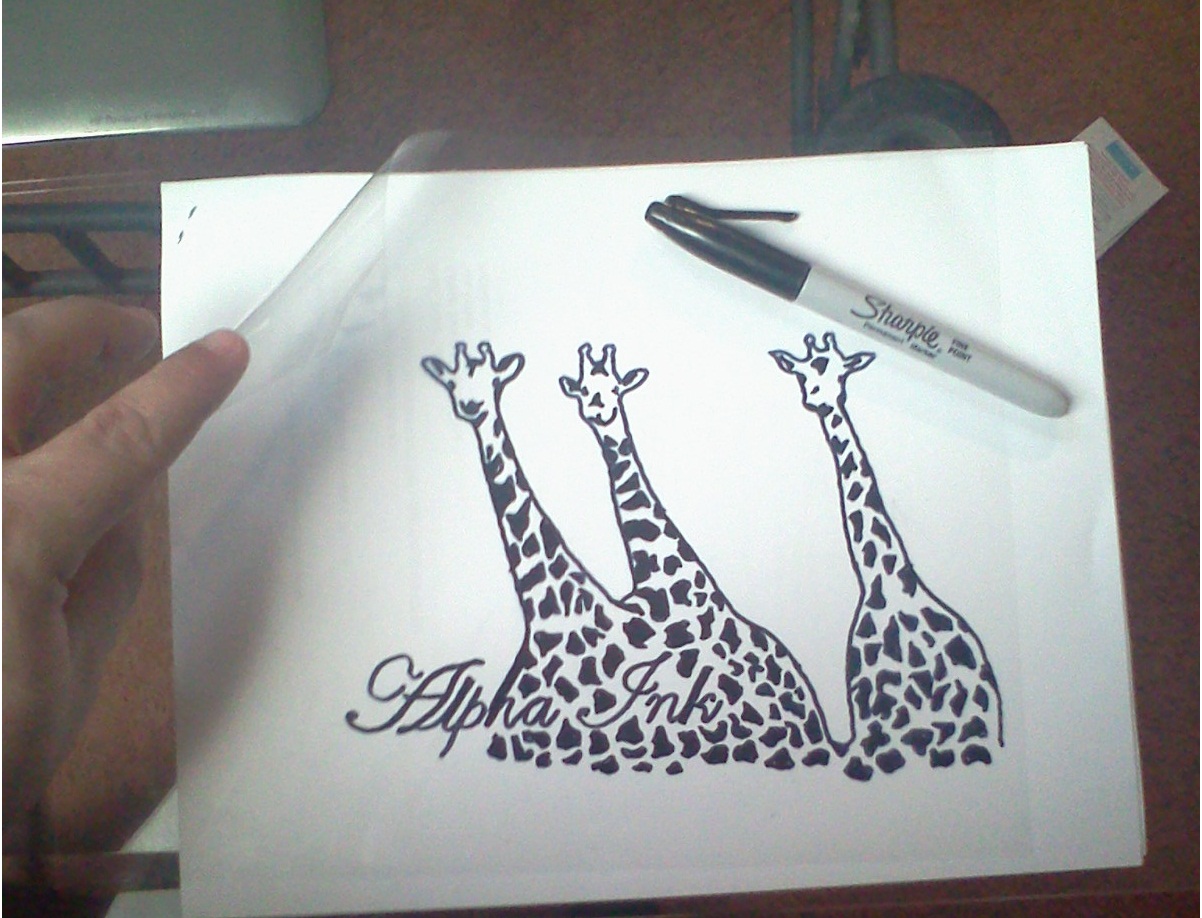
Tape the blank transparency paper to the table where your working at with clear tape. Choose any design that you want to print on a t-shirt. Once you have picked the design draw the design/drawing in the blank transparency using the black marker. If your artistic abilities are not so great, you can print the design/drawing from the computer. Place it behind the transparency and trace the design/drawing.
Remember for this step the design/artwork has to be all black. All the clear areas of the positive allow ultra violet light to pass trhough it. All the dark areas of the positive block the ultra violet light and leave the photo reactant emulsion on the background unharden.  All of the soft areas left unharden when sprayed with water will rinse out, leaving a hole in the mesh were ink can pass through.
Friday, February 4, 2011

First step

First of, you need a dark place with enough elbow room to work in. A table waist high in a dark room will do. The reason why the room has to be dark is because we are going to apply the photo emulsion to the silk screen, and the photo emulsion is sensitive to light. (Although some emulsions are safe against sun light.) 
The materials you will need to use with the next steps are: 
  • Silk screen. 
  • Photo emulsion.
  • Squeegee.
  • Towels.
  • Red photo dark-room light.
Ok, Ready? here we go:
  1. Place some towels on top of the table so you dont damage it with paint or emulsion.
  2. Wet the silk screen using the squeegee by spreading the emulsion on both sides, make sure you are doing this with no light present, also make sure the whole thing is wet, with no spots missed.  Since you cant use normal light to check if you got the screen fully wet, use a red photo-darkroom light.
  3. Let it dry in a complete dark room over night.


Wednesday, January 19, 2011

Materials required for screen printing.

You will need these materials:
1-Mesh screen: Depending on where your appliying your design(t-shirts, napkins, hats etc...) and the size of the design the mesh may vary.
2-Squeegee: The squeegee has to match the size of the screen, I mean not bigger than screen, if not the process will be harder.
2-Emulsion: Theres a lot of different emulsions out there the one I recomend is photo emulsion sold in any art store.
3-Clear tape: To secure your art to the screen.
4-Dark room: A dark closet or room with enough space.
5-Lamp: Any type will do. Bulbs has to be of more than 100w.
6-Water sprayer: This is to rinse the extra emulsion from your screen.
The nice thing about all this is that is at a low cost to you. Average price ranges from $31.99-$77.97(speedball starting kit in Amazon.com)